If you often take calls in noisy places, Voice Isolation is a must-know feature for your iPhone. It makes your voice clearer by minimizing background noise, so the person you’re talking to hears you and not the chaos around you.
Voice Isolation for FaceTime calls has been around for a while, iOS 16.4 added it for regular phone calls, and now in iOS 18.4.1, Apple has made it even better, and you can even set it as default for all calls.
Here’s how to use it:
How to Enable Voice Isolation During a Phone Call
- Start or answer a phone call (cellular or Wi-Fi call).
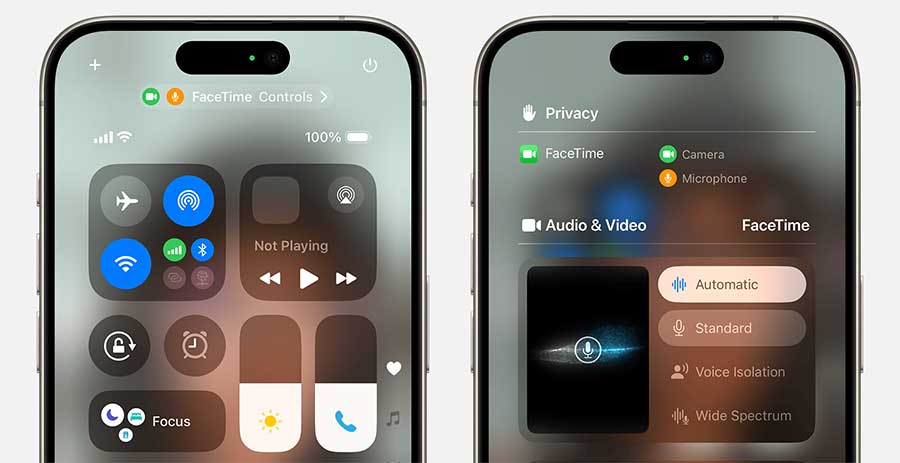
- Swipe down from the top-right corner of your screen to open Control Center. (iPhone SE 2nd and 3rd Gen users can swipe up from the bottom.)
- Tap on Phone Controls (you’ll see it near the top of the Control Center).
- Here you’ll see a couple of Mic Modes under Audio & Video. Select Voice Isolation from the list.

Close Control Center and continue your call. Your voice will now sound much clearer to the other person.
Note: You have to set it manually in each call unless you set it as default option (see below).
How to Make Voice Isolation the Default for All Calls
In iOS 18.4.1, you can finally set Voice Isolation to be enabled automatically for every call eliminating the need for manual switching.
Here’s how:
- Open the Settings app and head to Accessibility.
- Under the Hearing section, tap Audio/Visual followed by Mic Mode.
- Here, choose Voice Isolation as your default setting.
That’s it! From now on, whenever you make or receive a call, your iPhone will automatically use Voice Isolation.
Final Tips
Voice Isolation works for Phone, FaceTime, and even third-party apps like WhatsApp and Messenger calls. If you’re in a very quiet place, you can leave the setting at Standard, but honestly, Voice Isolation will still make your voice crisper even then.


